Canning How too..Part 2
Water Bath Canning
Step-by-Step Fresh Preserving of High-Acid-Foods
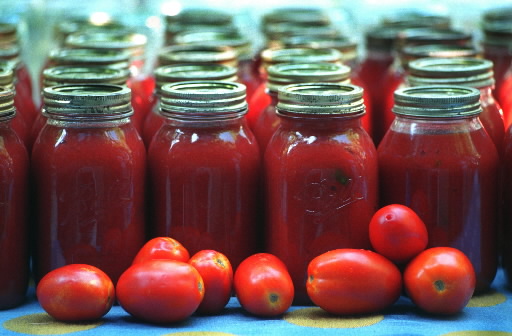
High-acid-foods are relatively easy to preserve, foods containing high amounts of acid are a popular choice for fresh preservers. These foods provide you with the opportunity to prepare and enjoy a wide array of home canning recipes, from excellent side dishes to delectable desserts. High-acid foods include fruits, fruit juices, jams, jellies and other fruit spreads, salsas, tomatoes with added acid, pickles, relishes, chutneys, sauces, vinegars and condiments.
Water Bath Canning Instructions
Pressure Canning: Step-by-Step Fresh Preserving of Low-Acid Foods
Vegetables, meats, poultry and seafood are such a natural part of family meal planning that preserving these low-acid foods ensures an economical and well-balanced diet throughout the year. Low-acid foods are easy to preserve, yet require special handling to eliminate the risk of spoilage caused by the bacteria Clostridium botulium and its toxin-producing spores. In order to prevent this type of spoilage, low-acid foods MUST be heat processed at a temperature of 240°F for the established processing time in a tested fresh preserving recipe.
Pressure canning is the only way to fresh preserve at 240°F. (Boiling water canners heat to only 212°F which is the temperature of boiling water.) Because Clostridium botulinum spores do not grow in the presence of acid, high-acid foods can be safely processed in a boiling-water canner.
Low-acid foods include vegetables, soups, stews, stocks, meats, poultry and seafood. Recipes that combine high-acid foods, such as tomatoes, with low-acid foods, such as vegetables or meats, are considered low-acid foods.
Follow the directions below or download and print our step-by-step, illustrated guide that walks you through home canning and teaches you how to can tomatoes, how to can salsa, how to can jams and jellies, and how to can your other favorite high-acid foods, and more!
You Will Need
- Tested preserving recipe such as one found in the Ball Blue Book® Guide to Preserving or our online recipe list.
- Boiling water bath canner or a large, deep saucepot with a lid, and a rack (when preserving high-acid foods such as soft spreads like jams and jellies, fruit juice, fruits, pickles and salsas)
- Glass preserving jars, lids and bands (always start with new lids).
- Common kitchen utensils, such as wooden spoon, ladle and funnel.
- Fresh produce and other quality ingredients
Other Helpful Home Canning Utensils:
Water Bath Canning Instructions
- READ through recipe and instructions. Assemble equipment and ingredients. Follow guidelines for recipe preparation, jar size, preserving method and processing time.
- CHECK jars, lids and bands for proper functioning. Jars with nicks, cracks, uneven rims or sharp edges may prevent sealing or cause jar breakage. The underside of lids should not have scratches or uneven or incomplete sealing compound as this may prevent sealing. Bands should fit on jars. Wash jars, lids and bands in hot, soapy water. Rinse well. Dry bands.
- HEAT home canning jars and lids in hot water, not boiling, until ready for use. Fill a large saucepan or stockpot half-way with water. Place jars in water (filling jars with water from the saucepan will prevent flotation). Bring to a simmer over medium heat. Keep jars hot until ready for use. You may also use a dishwasher to wash and heat jars. Place jar lids in a small saucepan. Cover lids with water and bring to a simmer over medium heat. Keep lids hot until ready to use. Do not boil lids. Keeping jars hot prevents them from breaking when hot food is added. To prevent seal failure, do not boil lids. Leave bands at room temperature for easy handling.
- PREPARE boiling water bath canner by filling half-full with water and keep water at a simmer while covered with lid until jars are filled and placed in canner. Be sure your rack in resting on the rim of the canner or on the bottom, depending on the type of rack you are using. You don’t necessarily need to purchase a boiling water bath canner if you don’t already have one at home. Most kitchens have pots that can double as boiling water bath canners.A boiling water bath canner is simply a large, deep saucepot equipped with a lid and a rack. The pot must be large enough to fully surround and immerse the jars in water by 1 to 2 inches and allow for the water to boil rapidly with the lid on. If you don’t have a rack designed for home preserving, use a cake cooling rack or extra bands tied together to cover the bottom of the pot.
- PREPARE tested preserving recipe using fresh produce and other quality ingredients.
- REMOVE hot jar from hot water, using a Jar Lifter, emptying water inside jar. Fill jar one at a time with prepared food using a Jar Funnel leaving headspace recommended in recipe (1/4inch for soft spreads such as jams and jellies and fruit juices; 1/2 inch for fruits, pickles, salsa, sauces, and tomatoes). Remove air bubbles, if stated in recipe, by sliding the Bubble Remover & Headspace Tool or rubber spatula between the jar and food to release trapped air and ensure proper headspace during processing. Repeat around jar 2 to 3 times.
- CLEAN mason jar rim and threads of jar using a clean, damp cloth to remove any food residue. Remove lid from hot water using a Magnetic Lid Lifter. Center hot lid on jar allowing sealing compound to come in contact with the jar rim. Apply band and adjust until fit is fingertip tight. Place filled jars in canner until recipe is used or canner is full. Lower rack with jars into water. Make sure water covers jars by 1 to 2 inches.
- PLACE lid on water bath canner. Bring water to a full rolling boil. Begin processing time.
- PROCESS jars in the boiling water for the processing time indicated in tested preserving recipe, adjusting for altitude (see altitude chart). When processing time is complete, turn off the heat and remove the canner lid. Allow jars to stand in canner for 5 minutes to get acclimated to the outside temperature.
- REMOVE jars from canner and set upright on a towel to prevent jar breakage that can occur from temperature differences. Leave jars undisturbed for 12 to 24 hours. Bands should not be retightened as this may interfere with the sealing process.
- CHECK jar lids for seals. Lids should not flex up and down when center is pressed. Remove bands. Try to lift lids off with your fingertips. If the lid cannot be lifted off, the lid has a good seal. If a lid does not seal within 24 hours, the product can be immediately reprocessed or refrigerated. Clean mason jars and lids. Label and share then store in a cool, dry, dark place up to 1 year.
Vegetables, meats, poultry and seafood are such a natural part of family meal planning that preserving these low-acid foods ensures an economical and well-balanced diet throughout the year. Low-acid foods are easy to preserve, yet require special handling to eliminate the risk of spoilage caused by the bacteria Clostridium botulium and its toxin-producing spores. In order to prevent this type of spoilage, low-acid foods MUST be heat processed at a temperature of 240°F for the established processing time in a tested fresh preserving recipe.
Pressure canning is the only way to fresh preserve at 240°F. (Boiling water canners heat to only 212°F which is the temperature of boiling water.) Because Clostridium botulinum spores do not grow in the presence of acid, high-acid foods can be safely processed in a boiling-water canner.
Low-acid foods include vegetables, soups, stews, stocks, meats, poultry and seafood. Recipes that combine high-acid foods, such as tomatoes, with low-acid foods, such as vegetables or meats, are considered low-acid foods.
Follow the directions below or download and print our step-by-step, illustrated guide that walks you through how to can meat, how to can vegetables and how to can other low-acid foods.
You Will Need
- Tested preserving recipe such as one found in the Ball Blue Book® Guide to Preserving or our online recipe list.
- Pressure canner (when preserving low-acid foods such as vegetables, meats, poultry and (food).
- Glass preserving jars, lids and bands (always start with new lids).
- Common kitchen utensils, such as wooden spoon, ladle and funnel.
- Fresh vegetables, meat, poultry or seafood and other quality ingredients.
Other Helpful Pressure Canning Utensils
Pressure Canning Directions
- READ through recipe and instructions. Assemble equipment and ingredients. Follow guidelines for recipe preparation, jar size, preserving method and processing time.
- CHECK jars, lids and bands for proper functioning. Jars with nicks, cracks, even rims or sharp edges may prevent sealing or cause jar breakage. The underside of lids should not have scratches or uneven or incomplete sealing compound as this may prevent sealing. Bands should fit on jars. Wash canning jars, lids and bands in hot, soapy water. Rinse well. Dry bands.
- HEAT jars and lids in hot water, not boiling, until ready for use. Fill a large saucepan or stockpot half-way with water. Place jars in water (filling jars with water from the saucepan will prevent flotation). Bring to a simmer over medium heat. Keep jars hot until ready for use. You may also use a dishwasher to wash and heat jars. Place lids in a small saucepan. Cover lids with water and bring to a simmer over medium heat. Keep lids hot until ready to use. Do not boil lids. Keeping jars hot prevents them from breaking when hot food is added. To prevent seal failure, do not boil lids. Leave bands at room temperature for easy handling.
- PREPARE for pressure canning. Fill the pressure canner with 2 to 3 inches of water. Place over medium-high heat. Bring to a simmer. Keep water at a simmer until jars are filled and placed in canner. Follow manufacturer’s instructions for usage instructions.
- PREPARE tested preserving recipe using fresh vegetables, meat, poultry or seafood and other quality ingredients.
- REMOVE hot jar from hot water, using a Jar Lifter, emptying water inside jar. Fill jar one at a time with prepared food using a Jar Funnel leaving headspace recommended in recipe (1/4 inch for soft spreads such as jams and jellies and fruit juices; 1/2 inch for fruits, pickles, salsa, sauces, and tomatoes). Remove air bubbles, if stated in recipe, by sliding the Bubble Remover & Headspace Tool or rubber spatula between the jar and food to release trapped air and ensure proper headspace during processing. Repeat around jar 2 to 3 times.
- CLEAN rim and threads of the mason jar using a clean, damp cloth to remove any food residue. Remove lid from hot water using a Magnetic Lid Lifter Center hot lid on jar allowing sealing compound to come in contact with the jar rim. Apply band and adjust until fit is fingertip tight. Place filled jars in canner until recipe is used or canner is full. Check that water level is about 2 to 3 inches high or that recommended in manufacturer’s manual.
- LOCK the pressure canner lid in place, leaving vent pipe open. Adjust heat to medium-high. Allow steam to escape through vent pipe. Once there is a steady stream of steam escaping, vent for 10 minutes to ensure there is no air (only steam) left in canner. Close vent using weight or method described for your canner. Gradually adjust heat to achieve and maintain recommended pounds of pressure.
- PROCESS canning jars at the recommended pounds pressure for the processing time indicated in tested preserving recipe, adjusting for altitude (cool pressure canner by removing from heat. Do not remove the weighted gauge. Let canner stand undisturbed until pressure returns to zero naturally. Follow manufacturer’s instructions. Wait 2 minutes. Remove weight and unlock lid, tilting away from yourself.
- REMOVE jars from pressure canner and set upright on a towel to prevent jar breakage that can occur from temperature differences. Leave jars undisturbed for 12 to 24 hours. Bands should not be retightened as this may interfere with the sealing process.
- CHECK lids for seals. Lids should not flex up and down when center is pressed. Remove bands. Try to lift lids off with your fingertips. If the lid cannot be lifted off, the lid has a good seal. If a lid does not seal within 24 hours, the product can be immediately refrigerated. Clean canning jars and lids. Label and share then store in a cool, dry, dark place up to 1 year.


Comments
Post a Comment